Author: ToolsTutor

  • How To Tighten A Bolt That Keeps Spinning?

    How To Tighten A Bolt That Keeps Spinning?

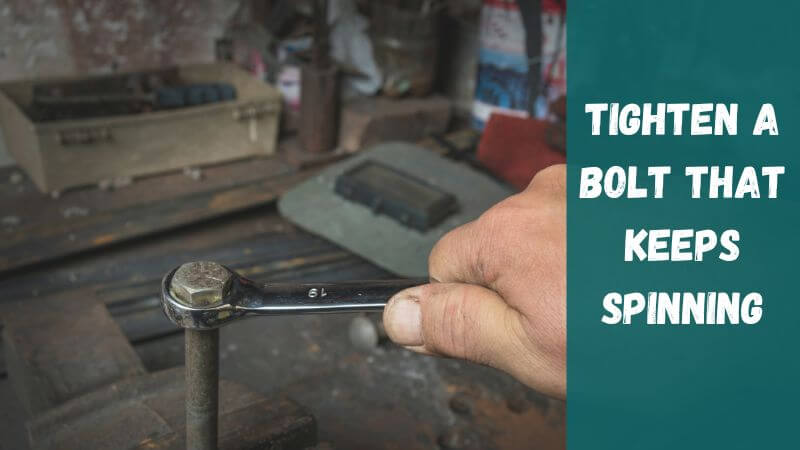
    If you’re trying to tighten a bolt and it keeps spinning, don’t worry–you’re not alone. This is a common problem, and there are a few different ways to solve it. In this blog post, we’ll walk you through how to tighten a bolt that keeps spinning, so you can get the job done right.

    Reasons for the bolts to keep spinning

    Threads are stripped

    It can be frustrating when you’re trying to screw in a bolt and the head just keeps spinning. This usually happens when the threads on the bolt are stripped, meaning they’re no longer able to grip the surface.

    This can happen over time as the bolts are tightened and loosened, and eventually, the threads will become worn down and unable to grip the bolt as tightly. This will cause the bolt to spin freely, and no matter how much you try to tighten it, it will just keep spinning.

    Holes are bigger than the bolts

    One possible reason why the bolts may keep spinning is because the holes are bigger than the bolts. This could cause the bolts to become loose and eventually spin out. If this is the case, it is important to ensure that the holes are the proper size for the bolts. Otherwise, the bolts may continue to spin and eventually come loose.

    Threads on the bolts may be damaged

    One possibility is that the threads on the bolts are damaged. This can happen if the bolts are not properly aligned when they are installed, or if they are tightened too forcefully. Over time, the damage to the threads can cause the bolts to spin more easily. If this is the case, it may be necessary to replace the bolts.

    Something blocking the holes

    One of the most common reasons why the bolts on a piece of equipment may keep spinning is because there is something blocking the holes. This can often be caused by debris or other materials that have become lodged in the holes, preventing the bolts from being able to properly grip. If this is the case, it is important to clear the holes and make sure that they are free of any obstructions before attempting to secure the bolts.

    Overtightening the bolts

    Overtightening the bolts is the most common reason why they spin. This usually happens when people try to use a power drill to tighten the bolts instead of doing it by hand. When the bolts are overtightened, it puts too much pressure on the threads and causes them to spin.

    Corrosion build-up

    One of the most common reasons why bolts may seem to “spin” when you’re trying to loosen them is because of corrosion build-up. Over time, moisture and other elements can cause a thin layer of rust to form on the surface of the bolt. This can make it very difficult to get a good grip on the bolt, which can cause it to spin around when you’re trying to loosen it.

    The washer isn’t seated correctly

    If the washer isn’t seated correctly, the bolts may keep spinning. This can be due to several factors, such as an uneven surface on the washer or the bolt not being tightened properly. If the problem persists, it may be necessary to replace the washer.

    Material may be too hard for the bolts to grip

    One potential reason the bolts may be spinning is that the material they are trying to grip is too hard. This could mean that the bolts are not able to get a good grip on the material, causing them to spin.

    Another similar possibility is that the material is too slippery, again making it difficult for the bolts to grip and causing them to spin. If either of these is the case, it may be necessary to try a different type of bolt or to use a different material.

    How to remove the bolt that keeps spinning and won’t come out?

    Loosening or removing the bolt is the primary stage of tightening it up. Below are few methods of how you can remove and loosen the bolt that keeps spinning.

    Use a higher quality wrench

    If you’re having trouble removing a bolt that keeps spinning, you may need to use a higher quality wrench. First, try using a wrench that’s the same size as the bolt. If that doesn’t work, try a slightly larger wrench. This will provide more grip and leverage, making it easier to loosen the bolt. Be sure to use caution when doing this, as too much force could damage the wrench or the bolt itself.

    Apply heat

    If you’re having trouble removing a bolt that keeps spinning, one method you can try is applying heat. First, use a heat gun or torch to heat up the bolt. This will help break down any rust or corrosion that may be binding the bolt in place. Just be careful not to overheat the area, as this could damage the surrounding materials. After that, use a wrench to try to loosen it. If the bolt is still stuck, you may need to use a stronger tool, such as an impact wrench.

    Use a lubricant

    If you’re trying to remove a bolt that keeps spinning, one possible solution is to use a lubricant. This can help break up any corrosion or debris that may be causing the issue. Apply a small amount of lubricant to the bolt and let it sit for a few minutes before trying to remove it again. If this doesn’t work, you may need to use a more powerful tool, such as a impact wrench, to break it free.

    Use a bolt extractor

    If you’re trying to remove a bolt that keeps spinning, you may be able to use a bolt extractor. Bolt extractors are tools that can be used to remove bolts that are stuck or stripped. To use a bolt extractor, you’ll need to insert it into the head of the bolt and turn it counterclockwise. You may need to use a wrench to help turn the bolt extractor.

    Use a hammer

    If you’re trying to remove a bolt that keeps spinning, one possible solution is to use a hammer. First, you’ll need to find a hammer that’s the right size and weight for the job. Then, you’ll need to position the hammer so that the head is resting on the bolt. Finally, you’ll need to strike the head of the hammer with enough force to loosen the bolt.

    Use a drill

    If you’re having trouble removing a bolt that keeps spinning, one method you can try is using a drill. First, make sure the drill is set to reverse. Then, place the drill bit on the head of the bolt and start the drill. The spinning action of the drill should help loosen the bolt. If the bolt is still stuck, you may need to use a bigger drill bit or try a different method.

    Try pliers

    If you’re trying to remove a stubborn bolt that keeps spinning, you may be able to use a pair of pliers to get a better grip. First, try to find a pair of pliers that have a good grip and that fit snugly around the bolt. Once you have the pliers in place, try to turn the bolt in the opposite direction from which it’s supposed to turn. If the bolt is still proving to be difficult, you may need to use a little more force. Be careful not to damage the bolt or the surrounding area.

    Crack the bolt

    If you’re trying to remove a bolt and it keeps spinning, you may be able to get it loose by cracking the bolt. To do this, first make sure that the bolt is slightly loose in the hole. Then, use a hammer to strike the bolt head in a clockwise direction. This should loosen the bolt enough so that you can remove it by hand. Be careful not to damage the surrounding area, though.

    How to tighten the bolt that keep spinning?

    Use a wider bolt

    If you’re having trouble tightening a bolt that keeps spinning, one possible solution is to use a wider bolt. This can give you more surface area to grip with your wrench or socket, making it easier to apply enough torque to finally get the bolt tight. Just be careful not to overtighten, as this can strip the threads or break the bolt entirely.

    Clean the hole

    If you’re having trouble tightening a bolt that keeps spinning, one potential solution is to clean the hole. Over time, dirt and debris can build up around the bolt, making it difficult to get a tight grip. By taking a few minutes to clean the hole, you may be able to get a better grip and finally tighten the bolt.

    Use thread locker

    If you’re having trouble tightening a bolt that keeps spinning, you can try using a thread locker. This is a substance that helps to bond threads together, making it easier to achieve a tight fit. Make sure to follow the instructions on the thread locker packaging, as application methods can vary.

    In general, you’ll want to apply the thread locker to the bolt before screwing it in place. Once the bolt is in place, you can try tightening it again. If it still won’t budge, you may need to consult a professional.

    Use right tool

    If you’re having trouble tightening a bolt that keeps spinning, there’s a few things you can try. First, make sure you’re using the right tool. A wrench or ratchet is usually the best choice. If the bolt is still spinning, try using a little lubricant on the threads.

    This will help grip the bolt and make it easier to turn. If you’re still having trouble, you can try heating up the bolt with a torch. This will expand the metal and make it easier to turn. Be careful not to overheat the bolt, though, as this can damage the metal.

    Replace the bolt if it is corroded

    If the bolt is corroded, the best way to fix the problem is to replace the bolt. To do this, first remove the old bolt by unscrewing it with a wrench. Once the old bolt is removed, take the new bolt and screw it into place. Use a wrench to tighten the new bolt until it is snug.

    FAQ

    Why do bolts loosen?

    There are a number of reasons why bolts loosen over time. One is simply due to the fact that bolts are subjected to a lot of stress and tension over time, which can gradually loosen them. Additionally, vibration can also cause bolts to loosen.

    This is often a problem with machinery or equipment that vibrates frequently or is located in a particularly vibration-prone environment. Another reason why bolts loosen is because of metal fatigue, which is when the metal of the bolt slowly wears down over time due to repeated stress and tension.

    Finally, corrosion can also cause bolts to loosen, as the corrosion process can weaken the metal and make it more susceptible to coming loose.

    Why is washer used in nuts and bolts?

    Washers are commonly used in conjunction with nuts and bolts, and serve a number of purposes. By creating a larger surface area, washers distribute the load of a fastener more evenly, which prevents the nut or bolt from becoming loose over time. In addition, washers can act as a space filler, and help to prevent two materials from coming into direct contact with each other (which can cause damage or wear over time).

    How to stop a bolt from loosening?

    It is important to keep bolts tight in order to prevent accidents and damage to equipment. Loose bolts can also be a safety hazard. Here are some tips on how to prevent bolts from loosening:
    -Make sure that the area around the bolt is clean and free of debris before tightening.
    -Use the correct size wrench or socket when tightening.
    -Do not overtighten the bolt.
    -Use a thread locking compound on the threads of the bolt. This will help to keep the bolt secure.
    -Inspect bolts regularly to make sure that they are tight and not showing any signs of wear.

    What tool do you use to tighten a bolt?

    The wrench is the most common tool used to tighten a bolt. There are many different types and sizes of wrenches, so it is important to choose the one that is best suited for the job at hand. If you are working with a large bolt, you may need to use a socket wrench. Socket wrenches come in a variety of sizes and can be attached to a ratchet, which will give you more leverage and make it easier to tighten the bolt.

    What is the difference between a screw and a bolt?

    A screw is a type of fastener that is used to join two or more pieces of material together. screws are made with a variety of different materials, including metal, plastic, and wood. screws are typically inserted into a pre-drilled hole in one of the pieces of material and then screwed into place.

    A bolt is a type of fastener that is used to join two or more pieces of material together. Bolts are made with a variety of different materials, including metal, plastic, and wood. Bolts typically have a head that is larger than the body of the bolt, which allows them to be screwed into place.

    Conclusion

    In conclusion, while tightening the bolt, don’t tighten it so hard your hands hurt. If you need to, take an extra step or two back, loosen the bolt slightly, and tighten it a few more turns. Then continue tightening it, before moving on. A well-tightened bolt should help your wrench slide right in, and help your bolt turn smoothly.

  • 3/8 Inch Vs 1/2 Inch Drill – Which One Is Better?

    3/8 Inch Vs 1/2 Inch Drill – Which One Is Better?

    Whether you’re a professional contractor or a DIYer, you know that having the right tools for the job is important. When it comes to drilling, the size of the drill bit is critical. So, what’s the difference between a 3/8 inch drill and a 1/2 inch drill? And which one is right for your project? When it comes to choosing the right drill bit, there are a few factors to consider. In this blog post, we’ll be looking at the difference between 3/8 inch and 1/2 inch drill bits, and which one is right for the job.

    Why do drills have different sizes?

    Different drills have different sizes for different purposes. For example, a larger drill may be needed for a tougher material, while a smaller drill may be better for more delicate material.

    Additionally, the size of the drill may be determined by the project you are working on – a larger hole may be needed for a project that requires more precision. Ultimately, it is important to select the right size drill for the job at hand in order to ensure the best results.

    What is a 3/8 drill?

    A 3/8 drill is a type of hand-held power drill that is commonly used for various home improvement and DIY projects. It is typically used to drill holes in walls, floors, and ceilings, as well as to screw in or unscrew fasteners. It is a versatile tool that can be used for a variety of applications, such as drilling through wood, metal, plastic, and more. This type of drill typically has a chuck that can accommodate bits with a 3/8-inch diameter.

    [su_note note_color=”#ffffff” text_color=”#282828″ radius=”6″][su_row][su_column size=”1/2″ center=”no” class=””]

    [/su_column][su_column size=”1/2″ center=”no” class=””]

    Makita 3/8 inch 12V MAX Lithium-Ion Brushless Cordless Driver-Drill Kit

    [su_button url=”https://www.amazon.com/Makita-FD07R1-Lithium-Ion-Brushless-Driver-Drill/dp/B01DKCE4C4?keywords=3%2F8+cordless+drill&qid=1669906799&sr=8-7&linkCode=ll1&tag=toolstutor-20&linkId=fe5d225b61e2d3a3344b85a0f8afad8a&language=en_US&ref_=as_li_ss_tl” target=”blank” style=”stroked” background=”#ed8801″ size=”8″ rel=”nofollow noopener”]Check Latest Price[/su_button]
    [/su_column][/su_row][/su_note]

    What is a 1/2 drill?

    A 1/2 drill is a power drill that comes with a 1/2-inch chuck size. This type of drill is ideal for medium to large drilling projects. It can handle a variety of drill bits and has enough power to drill through tougher materials.

    A 1/2 drill is a tool that is used to create holes in various materials. It is a handheld device that is powered by electricity, and it has a cylindrical bit that is attached to a spindle. The bit is made of high-speed steel or carbide, and it is used to drill through materials such as wood, metal, and plastic.

    [su_note note_color=”#ffffff” text_color=”#282828″ radius=”6″][su_row][su_column size=”1/2″ center=”no” class=””]

    [/su_column][su_column size=”1/2″ center=”no” class=””]

    DEWALT 1/2-Inch 20V MAX Cordless Drill / Driver Kit

    [su_button url=”https://www.amazon.com/DEWALT-DCD791D2-Li-Ion-Brushless-Compact/dp/B0183RLVSQ?keywords=3%2F8%2Bcordless%2Bdrill&qid=1669906799&sr=8-16&th=1&linkCode=ll1&tag=toolstutor-20&linkId=1e70969ffbfad73fd677ec3d0b4e30b5&language=en_US&ref_=as_li_ss_tl” target=”blank” style=”stroked” background=”#ed8801″ size=”8″ rel=”nofollow noopener”]Check Latest Price[/su_button]
    [/su_column][/su_row][/su_note]

    Similarities between 3/8 and 1/2 drills

    Popularity

    3/8 and 1/2 inch drills are both popular choices for many different drilling applications. Both sizes are versatile and can be used in a variety of situations. 3/8 inch drills are typically used for smaller projects, while 1/2 inch drills are better suited for larger projects. Both sizes of drill are widely available and come in a variety of different styles and brands.

    Availability

    BBoth 3/8 and 1/2 inch drills are readily available on the market. They are both common sizes for home projects and general repairs. Both sizes are also widely available in terms of drill bits and accessories. When it comes to choosing between the two, it really comes down to personal preference and the specific project you are working on.

    Functionality

    There are several key ways in which 3/8 and 1/2 drills are similar in terms of functionality. Both types of drills are designed for use with a variety of different materials, including wood, metal, and plastic.

    Additionally, both 3/8 and 1/2 drills are capable of creating large and small holes, depending on the needs of the user. Finally, both types of drills come with a variety of different attachments and accessories that can be used to customize the drilling experience.

    Use of standard drill bits

    Both 3/8 and 1/2 drills are able to use standard drill bits, making them both highly versatile tools. 3/8 drills are typically used for lighter work, while 1/2 drills are better suited for heavier duty projects. However, both types of drills can handle a wide range of tasks, making them both excellent choices for the average do-it-yourselfer.

    Easy to use

    Both 3/8 and 1/2 inch drills are easy to use, especially when compared to other types of drills. They are both lightweight and have a comfortable grip, making them perfect for a variety of projects. Additionally, both drills come with a variety of accessories that make them even more versatile.

    Dissimilarities between 1/2 and 3/8 drills

    Size of drill bit

    The most significant difference between 1/2 and 3/8 drills is the size of the drill bit. A 1/2 inch drill bit is significantly larger than a 3/8 inch drill bit, meaning that it can create a larger hole.

    This can be beneficial when drilling through thicker materials. Additionally, the larger size of the 1/2 inch drill bit may make it more difficult to control, so it is important to use caution when operating this type of drill.

    Application

    1/2 inch drills are typically used for larger holes, while 3/8 inch drills are best suited for smaller holes. When choosing a drill bit, it is important to consider the size of the hole you need to make, as well as the material you will be drilling through. For example, softer materials like wood will require a smaller drill bit, while harder materials like metal will require a larger drill bit.

    Price

    When it comes to price, there is a big difference between 1/2 and 3/8 drills. 1/2 drills are significantly more expensive than 3/8 drills. This is because 1/2 drills are much more powerful and durable than 3/8 drills. They can handle tougher projects and last longer.

    So, if you need a drill that can handle tougher projects and last longer, then you should go with a 1/2 drill. However, if you are on a budget and are only looking for a drill for light projects, then a 3/8 drill is a good option.

    Speed

    When it comes to speed, 1/2 and 3/8 drills are quite different. A 1/2 drill is going to be significantly faster than a 3/8 drill. This is because the 1/2 drill has a larger motor that can handle more speed. The 3/8 drill is going to be slower because it has a smaller motor. This doesn’t mean that the 3/8 drill is necessarily a bad choice, it just means that it isn’t going to be as fast as the 1/2 drill.

    Torque

    When it comes to torque, 1/2 drills are significantly more powerful than 3/8 drills. This is because 1/2 drills have a higher motor speed and are able to generate more torque. This added power and torque can make a big difference when drilling through tougher materials. In addition, 1/2 drills tend to be more durable and have a longer lifespan than 3/8 drills.

    FAQ on 1/2 and 3/8 drill

    What can I use if I don’t have a 3/8 drill bit?

    If you don’t have a 3/8 drill bit, you can use a 1/2 inch drill bit. This will give you a slightly larger hole, but it will still work for most applications. If you need an even larger hole, you can use a saw to cut through the material.

    What size hole does a 3/8 drill bit make?

    A 3/8 drill bit makes a hole that is 3/8 of an inch in diameter. This is the most common size drill bit used for general purpose drilling in wood, metal, and plastic. It can also be used for drilling larger holes in softer materials.

    How to measure a drill bit?

    To measure a drill bit, you will need a micrometer. First, make sure that the anvil and spindle of the micrometer are clean and free of debris. Next, insert the drill bit into the anvil, making sure that the bit is perpendicular to the anvil. Finally, use the spindle to take a measurement of the drill bit.

    What is a 1/8 drill bit in mm?

    A 1/8 drill bit in mm is a small drill bit that is typically used for drilling small holes. This drill bit is made of high-speed steel and is designed for use in a drill press or a hand drill. The drill bit has a diameter of 3.175 mm and a length of 38.1 mm. The drill bit is used for drilling holes in wood, plastic, and metal.

    What size drill bit for a 1/2 inch tap?

    When it comes to choosing the best size drill bit for a 1/2 inch tap, there are a few factors to consider. The first is the material the tap will be used on. If the tap will be used on a softer material, a smaller drill bit ( 7/16 inch) may be sufficient. However, if the tap will be used on a harder material, a larger drill bit (9/16 inch) will be necessary.

    Another factor to consider is the pitch of the tap. A tap with a finer pitch will require a smaller drill bit, while a tap with a coarser pitch will require a larger drill bit.

    Can You Use a 3/8 Drill Bit in a 1/2 Inch Drill?

    The answer is yes, you can use a 3/8 drill bit in a 1/2 inch drill, but there are a few things to keep in mind. First, the 3/8 drill bit will likely spin faster in the 1/2 inch drill, so be careful not to over-tighten or strip the screws you’re working with. Second, the 3/8 drill bit may not be long enough to reach the depth of the 1/2 inch drill, so you may need to use an extension.

    3/8 or 1/2 inch drill – which one is bigger, stronger, and faster?

    3/8 inch drills are typically smaller and lighter than 1/2 inch models, making them easier to handle and maneuver. They’re also usually more affordable.

    However, 1/2 inch drills tend to be more powerful, making them better suited for heavy-duty tasks. They also typically have more features and options than 3/8 inch models.

    The preference of the drill depends on the project you’re working on. If you need to drill through thicker materials, then the 3/8 inch drill is the better choice. It can handle more torque and is less likely to stall. If you’re working with thinner materials, the 1/2 inch drill is a better option. It’s faster and can create cleaner holes.

  • How Much Does It Cost To Drill A Hole In Granite?

    How Much Does It Cost To Drill A Hole In Granite?

    If you’re looking to add a new sink or faucet to your kitchen or bathroom, you may be wondering how much it will cost to drill a hole in granite. The answer depends on a few factors, including the type of granite you have, the thickness of the granite, and the size of the hole you need. Here’s a breakdown of the costs you can expect to pay for drilling a hole in granite.

    You can drill granite by yourself or by professionals. To drill a hole in granite by yourself, you will need a drill bit that is specifically designed for granite. These bits are available at most hardware stores. The cost of the drill bit will vary, depending on the size and quality of the bit.

    You will also need to rent or purchase a drill, which will add to the cost. In addition, you will need to purchase or rent a wet saw, which is necessary to cut the granite. The cost of the wet saw will also vary, depending on the size and quality of the saw.

    Cost of drilling a hole in granite

    The cost of drilling a hole in granite can vary depending on the size of the hole and the type of granite. Generally, small holes can be drilled for around $100, while larger holes may cost up to $1,000.

    Generally, a small hole (1-2 inches in diameter and 1-2 feet deep) can be drilled for around $100, while a larger hole (3-4 inches in diameter and 2-3 feet deep) can cost upwards of $300. The cost will be higher for thicker granite and larger holes.

    Pros and cons of granite

    Advantages of using granite for kitchen countertop

    There are many reasons to consider using granite in your kitchen. Here are just a few of the advantages:

    • Granite is a very strong and durable material, making it an ideal choice for kitchen countertops.
    • It is heat resistant, so you can place hot pans on it without damaging the surface.
    • Granite is also stain resistant, so you don’t have to worry about spills and stains ruining your countertops.
    • Granite is a natural material that adds a touch of luxury and elegance to your kitchen.
    • It is easy to care for and maintain, so you can enjoy your beautiful countertops for many years.
    • Granite comes in a wide range of colors and patterns to suit any kitchen design.

    Disadvantages of using granite for kitchen countertop

    • Granite is a porous material, so it can absorb liquids and spills, which can lead to staining.
    • It is a hard material, so it can be difficult to cut and shape without the proper tools and equipment.
    • Granite is a heavy material, so it can be difficult to transport and install.
    • Granite is a costly material, so it may not be affordable for everyone.
    • It requires regular maintenance, such as sealing and polishing, to keep it looking its best.

    Why do people drill through granite in the kitchen?

    Cut a hole in granite countertop for a sink

    When it comes to adding a sink to a granite countertop, there are two main options: cut a hole in the countertop for the sink, or purchase a pre-made granite sink. Many homeowners opt to cut a hole in the countertop, as it allows for a more custom look. Plus, it can often be more cost effective than purchasing a pre-made sink.

    Drilling hole in granite for RO system

    You need to drill a hole in granite for your reverse osmosis (RO) system for a few reasons. First, the RO system needs a place to discharge the wastewater that it produces during the filtration process. Second, the RO system needs a place to connect a drain line so that filtered water can be directed to your home’s plumbing system. Third, the RO system needs a place to connect a power source so that it can operate. Drilling a hole in granite is the best way to provide all of these connections for your RO system.

    Drill hole in granite countertop for dishwasher

    When installing a dishwasher in your kitchen, you will need to drill a hole in your granite countertop to accommodate the water line. This may seem like a daunting task, but with the right tools and a little bit of know-how, it is actually quite simple.

    Cut hole in granite for soap dispenser

    When installing a soap dispenser in your kitchen, you may be wondering why it’s necessary to cut a hole in the granite. There are a few reasons for this. First, it ensures that the soap dispenser is securely installed and won’t come loose over time. Second, it allows the soap dispenser to be properly plumbed so that soap can easily flow out of it. Lastly, it provides a finished look to the installation.

    Drilling hole in granite for kitchen faucet

    When installing a kitchen faucet, it’s important to drill a hole in the granite to ensure a proper and secure fit. This hole will allow you to attach the faucet to the granite countertop, ensuring it is stable and won’t come loose over time.

    Why do you need to hire professionals to cut a hole in granite?

    If you’re considering a DIY project to cut a hole in your granite countertop, you may want to think twice. Though it may seem like a simple task, cutting granite requires specialized tools and training to do it safely and correctly.

    Granite is one of the hardest materials on Earth, which is why it’s such a popular material for countertops and other home surfaces. But that hardness is also what makes it difficult to cut without the proper tools and training.

    A common material used to cut granite is diamond, as its hardness allows it to cut through granite easily. However, diamond is also an expensive material, and most DIYers don’t have access to it.

    Professionals have the right tools

    When working with granite, it is important to have the right tools to ensure a clean, precise cut. Professionals will typically use a diamond saw blade to cut through the stone. However, depending on the thickness of the granite, a different type of saw blade may be required.

    For example, if the granite is less than 1 inch thick, a wet saw may be used. Wet saws use a water-cooled diamond blade to cut through the stone, which helps to prevent the granite from overheating and cracking. If the granite is thicker than 1 inch, a dry saw may be used. Dry saws use a diamond blade that is not cooled with water, so they can cut through thicker pieces

    Professionals have experience in drilling through granite

    When it comes to drilling through granite, professionals have the experience and expertise to get the job done quickly and efficiently. With the right tools and techniques, they can make short work of even the hardest granite.

    Professionals will save you money

    When it comes to drilling granite, you want to make sure that you’re using the right tools and techniques to get the job done right. Otherwise, you could end up damaging your granite and incur expensive repair costs. That’s why it’s always best to hire a professional when drilling granite.

    Not only do professionals have the right tools and experience to get the job done quickly and efficiently, but they can also help you avoid making costly mistakes. With a professional on your side, you can rest assured that your granite will be properly drilled without any damage. In the end, hiring a professional will save you time, money, and hassle.

    FAQ

    How to enlarge a granite hole?

    If you need to enlarge a hole in granite, you’ll need to use a diamond-tipped drill bit. Start by marking the center of the hole with a felt-tipped marker. Then, using a hammer and chisel, make a small indentation at the center of the mark. This will help prevent the drill bit from slipping.

    Next, attach the drill bit to a drill and set it to the highest setting. Place the tip of the drill bit on the indentation and slowly begin drilling into the granite. Drill for a few seconds, then lift the drill bit up to clear any debris that has accumulated. Repeat this process until the hole is the desired size.

    Can I cut a granite hole by myself?

    If you’re considering undertaking a DIY granite project, you may be wondering if you can cut a hole in granite by yourself. The short answer is yes, you can cut a hole in granite, but it’s certainly not a simple task. Cutting granite requires specialized tools and experience, so unless you have both of those things, we recommend leaving it to the professionals.

    Is the marble kitchen bad?

    While marble countertops can give your kitchen a luxurious look, they require more maintenance than other types of countertops. Marble is a softer stone than granite, so it is more susceptible to scratches and staining. If you’re not willing to put in the work to keep your marble countertops looking their best, you might be better off choosing another material.

    Can a hammer drill cut hole in granite?

    While a hammer drill may be able to create a hole in granite, it is not the ideal tool for the job. A hammer drill is designed for drilling into softer materials, such as wood or drywall. The high-impact nature of the hammer drill can cause it to shatter the granite, resulting in a messy and dangerous project. It is best to use a diamond tip drill bit when creating holes in granite.

    What is the most expensive countertop material?

    The most expensive countertop material is typically granite. Granite is a popular choice for countertops because it is durable and has a wide range of colors to choose from. However, the price of granite can vary greatly depending on the quality of the granite and the company you purchase it from.

    Conclusion

    In summary, Granite is a very hard and durable material, and when used in construction, is second only to diamonds in hardness. Granite’s resistance to scratching, staining, and erosion makes it ideal for building patios, steps, and pool decking. Granite can be polished to give a nice, smooth finish, or left in its natural state. As it is expensive and sophisticated, it’s better to call a professional to drill through it.

  • How To Drill Through Tile Without Cracking?

    How To Drill Through Tile Without Cracking?

    If you’re looking to drill through porcelain and ceramic tile without cracking it, then you’ve come to the right place. In this blog post, we’ll walk you through the steps you need to take in order to successfully drill through porcelain tile without cracking it. We’ll also provide some tips and tricks that will help you avoid cracking the tile in the first place.

    Porcelain and ceramic tiles are popular choices for both indoor and outdoor use because of its beauty and durability. But while it’s a tough material, porcelain tile can still crack if it’s not drilled properly.

    That’s why it’s important to use the right drill bit and to take your time when drilling through porcelain tile. With the right tools and technique, you can drill through porcelain and ceramic tile without cracking it.

    What kind of drill bit for tile?

    When it comes to drilling through tile, you need to make sure you have the right type of drill bit. If you use the wrong type of drill bit, you could end up damaging the tile or causing the drill bit to break.

    So, what is the best type of drill bit for porcelain tile? The best type of drill bit to use is a diamond tip drill bit. These drill bits are designed to cut through hard materials, like porcelain tile, without damaging them.

    If you don’t have a diamond tip drill bit, you can also use a carbide-tipped drill bit. These drill bits are also designed to cut through hard materials, but they are not as effective as the diamond tip bits.

    There are a few different types of drill bits that can be used on ceramic tile, but carbide-tipped drill bits are generally the best option. These drill bits are made with a harder material that can withstand the rigors of drilling through tile. They also tend to stay sharper for longer, which means you can get through your project faster.

    Choosing the right drill bit for drilling tiles

    Porcelain tile comes in both glazed and unglazed varieties, and each type requires a different type of drill bit. Glazed porcelain tile is harder and denser than unglazed tile, so you’ll need a diamond drill bit specifically designed for porcelain.

    On the other hand, unglazed porcelain tile is more porous than glazed tile, so you’ll need a carbide-tipped drill bit.

    Once you’ve selected the right type of drill bit, you need to consider the size of the hole you need to drill. Porcelain tile is very strong, so you’ll need a smaller drill bit for a smaller hole. For a 1/4″ hole, for example, you’ll need a 3/16″ drill bit.

    What kind of drill for drilling tile?

    When choosing a drill machine for porcelain tile, there are a few things you’ll want to keep in mind. First, consider the type of tile you’re working with. Porcelain tile is harder and denser than ceramic tile, so you’ll need a drill with more power.

    Consider the thickness of the tile. Thicker tiles will require a more powerful drill. With these factors in mind, you’ll be able to choose the best drill machine for your porcelain tile project.

    You should also consider the power of the machine. You’ll want a machine that is powerful enough to drill through the tile without too much effort.

    Drilling into ceramic or porcelain tiles- 5 step process

    If you’re looking to add a new backsplash or update your bathroom tile, you’ll need to know how to drill into tiles. Here are five easy steps to get the job done:

    1. Start by selecting the right drill bit. For ceramic tiles, you’ll need a carbide-tipped bit that’s specifically designed for drilling through hard materials.
    2. Once you have the right drill bit, mark the tile where you’ll be drilling. Use a pencil or a Sharpie to make a small dot on the tile. This will help you keep the drill bit steady as you start drilling.
    3. To drill through the tile, apply gentle pressure and keep the drill bit level. Keep the drill bit level and straight as it penetrates the tile.
    4. Slowly release the pressure on the drill bit and trigger when the bit has reached the desired depth.
    5. Drill slowly. This will help to prevent the drill bit from overheating and damaging the tile.

    Bonus tips on drilling porcelain tiles

    Always use a sharp drill bit – a dull bit will make it difficult to drill through the tile and can cause the tile to crack.

    Use a slower drill speed – this will help to prevent the drill bit from overheating and will make it easier to control.

    Apply gentle pressure when drilling – too much pressure can cause the drill bit to slip and can also damage the tile.

    Use a water-based lubricant – this will help to keep the drill bit cool and will also help to prevent the tile from cracking.

    Start drilling at an angle – this will help to prevent the drill bit from slipping and will make it easier to control the drill.

    Reasons for tiles to crack during drilling

    There are several reasons why tiles may crack during the drilling process. In many cases, it is due to the type of tile or the drilling method being used. Here are five of the most common reasons for tiles to crack during drilling:

    Incorrect Drilling Method

    One of the most common reasons for tiles to crack during drilling is using the incorrect drilling method. When drilling through tile, it is important to use a hammer drill on the lowest setting. If a standard drill is used, it can cause the tile to spin and crack.

    Type of Tile

    Another common reason for tiles to crack during drilling is the type of tile. Some types of tile, such as glass or glazed tiles, are more brittle than others and more prone to cracking. If you’re not sure what type of tile you’re dealing with, it’s always best to err on the side of caution and go slowly when drilling.

    Too much pressure

    If you apply too much pressure while drilling into tile, you run the risk of cracking the tile. Cracks can occur in the tile itself or in the grout lines. To avoid cracking the tile, apply just enough pressure to keep the drill bit moving steadily forward.

    Hardness of the tile

    One of the reasons that tiles may crack during drilling is due to the hardness of the tile. If the tile is too hard, it is more likely to crack when a hole is being drilled into it. In order to avoid this, it is important to choose a tile that is of an appropriate hardness for the project at hand.

    Age of the tile

    Age is one of the primary reasons why tile may crack during drilling. As tile ages, it becomes more brittle and therefore more susceptible to cracking. Additionally, repeated exposure to water and other elements can also weaken tile, making it more likely to crack when drilled.

    FAQ on drilling tiles

    How to drill porcelain sink?

    To drill a hole in a porcelain sink, you will need to use a carbide-tipped drill bit. Start by putting a piece of tape over the area where you will be drilling to help prevent the drill bit from slipping. Then, use a slow speed and steady pressure to drill through the porcelain. Be sure to wear eye protection and gloves while doing this.

    Can you cut holes in ceramic tiles?

    It is possible to cut holes in ceramic tiles, though it is not always recommended. Doing so may cause the tile to crack or break, which can lead to costly repairs. If you must cut a hole in a ceramic tile, be sure to use a sharp, diamond-tipped saw blade to minimize the risk of damage.

    How to drill through porcelain floor tile?

    To drill through porcelain floor tile, you will need to use a carbide-tipped masonry bit. First, mark the area where you will be drilling with a pencil. Next, use a tape measure to find the center of the area you will be drilling, and make a small pilot hole. Finally, insert the carbide-tipped masonry bit into your drill, and drill through the tile.

    How to drill large holes in porcelain tiles?

    To drill a large hole in a porcelain tile, you will need to use a hole saw with a carbide-tipped blade. First, mark the center of the hole on the tile with a pencil. Then, using a hammer and chisel, make a small indentation at the center point.

    Next, attach the hole saw to a drill and slowly start drilling into the tile. Apply gentle pressure and keep the drill steady. As the hole saw starts to cut through the tile, it will create a lot of dust. So be sure to wear a dust mask and eye protection.

    Once the hole saw has cut through the tile, remove it from the drill and clean out any debris from the hole.

    Conclusion

    I think I have covered a lot regarding drilling through pocelain and ceramic tiles. You have be extra careful while drilling because it may create crack and destroy your valuable and precious tiles. Additionally, choose the right method and tools for right kind of tile to avoid any mishap. If you have liked my suggestions, you may share this article to your friends. Have a good day!

  • How to Drill Into Concrete With Or Without A Hammer Drill?

    How to Drill Into Concrete With Or Without A Hammer Drill?

    Concrete is one of the most durable construction materials available, but it can be a challenge to work with. Drilling into concrete without a hammer drill can be difficult, but it is possible with the right tools and techniques. In this blog post, we’ll share some tips on how to drill into concrete without a hammer drill, including the best tools to use and the most effective drilling techniques.

    You may read our article if you are looking for a hammer drill that can drill into the concrete.

    How to drill into the concrete wall with a hammer drill?

    Can you drill into the concrete wall with a hammer drill?

    Yes you can. Whether or not you can drill into a concrete wall with a hammer drill depends on several factors, including the type of concrete, the type of drill bit, and the amount of pressure you apply. If you’re unsure about whether or not your drill bit will be able to penetrate the concrete, it’s always best to err on the side of caution and use a hammer drill with a carbide-tipped masonry bit.

    Type of hammer drill is necessary to drill into concrete

    If you’re planning on doing any type of home improvement that involves drilling into concrete, you’re going to need a hammer drill. A hammer drill is a specialized type of drill that is designed to handle the tough drilling challenges that come with masonry and concrete.

    There are a few different types of hammer drills on the market, so it’s important to know which one is right for your project. If you’re only drilling into concrete occasionally, a corded hammer drill is a good option. Cordless hammer drills are ideal for more frequent use, but they can be more expensive.

    When it comes to choosing the right size and power for your needs, it’s important to consider the type of project you’re working on. If you’re drilling large holes, you’ll need a more powerful drill. For smaller projects, a lower-powered drill will suffice.

    No matter what type of hammer drill you choose, be sure to read the manufacturer’s instructions carefully before using.

    Drilling into the concrete wall with a hammer drill : 5 step process

    If you’re looking to drill into a concrete wall, a hammer drill is the way to go. Here’s a quick and easy 5-step guide on how to do it:

    1. Start by putting on the right safety gear, including eye protection and gloves.
    2. Next, mark the spot on the wall where you want to drill. Use a carbide-tipped masonry bit to drill a pilot hole.
    3. Then, set up your hammer drill with the correct bit for concrete.
    4. Slowly and steadily start drilling into the wall, applying firm but not too much pressure. As you drill, keep the drill bit moving to avoid overheating.
    5. When you’ve reached the desired depth, release the trigger and let the drill bit cool before removing it from the concrete.
      That’s all there is to it. With these simple steps, you’ll be able to quickly and easily drill into any concrete wall.

    How to drill into concrete without a hammer drill?

    Use a standard drill with masonry drill bit

    If you’re planning on drilling into concrete, you might be wondering if your standard drill will be up to the task. The good news is that, in most cases, a standard drill can indeed go through concrete. However, there are a few things you’ll need to keep in mind in order to ensure a successful drilling experience.

    First, try using a masonry drill bit. These bits are designed to drill into tougher materials like concrete. If you don’t have a masonry drill bit, you can also use a carbide-tipped drill bit. These bits are also designed for drilling into tougher materials, and they’ll stay sharper for longer than a standard drill bit.

    Start by drilling slowly and then increase the speed as needed. You may also need to apply more pressure than usual when drilling into concrete.

    Specification of the regular drill to drill into concrete

    If you’re looking to drill into concrete, you’ll need a non hammer drill with the following specifications: a low speed (between 600 and 1,200 revolutions per minute), a high torque, and a carbide-tipped masonry drill bit. Drilling into concrete is a tougher task than drilling into other materials, so make sure your drill is up for the job.

    To drill into concrete, you will need a non-hammer drill with a carbide-tipped masonry bit. The size of the bit will depend on the size of the hole you need to drill. For example, a 1/4-inch masonry bit will create a hole that is large enough for a 1/4-inch concrete anchor.

    Use a hammer and a chesel

    What kind of hammer and chisel do you need?

    When it comes to drilling into concrete, you need to use the right type of hammer and chisel. Otherwise, you run the risk of damaging the material.
    For instance, a claw hammer is not going to be effective. Instead, you need to use a rotary hammer drill. This type of hammer is specifically designed for drilling into concrete and other hard materials. It has a rotating head that quickly pounds the chisel into the surface.

    As for the chisel, you need to use a carbide-tipped chisel. This will help to ensure that the chisel does not get damaged when drilling into the concrete.

    Drilling into the concrete with a hammer and a chisel in 5 steps

    After you have got the right hammer and chisel, here are five steps to follow:

    1. First, mark the spot where you need to drill. Make sure to use a pencil or chalk so that the mark is visible.
    2. Next, take your hammer and chisel and position the chisel at a 45-degree angle.
    3. Then, hit the chisel with the hammer until you create a small hole in the concrete.
    4. Continue hitting the chisel and moving it around the hole until the hole is big enough for your needs.
    5. Finally, remove any debris from the hole and you’re ready to go!

    Use a core drill

    Considerations while using a core drill to drill into the concrete

    If you’re looking to drill into concrete with a core drill, there are a few things you’ll need to keep in mind. First, make sure you have the proper drill bit for the job. Core drill bits are designed to drill through concrete and other masonry materials, so using a regular drill bit will likely damage both the bit and the concrete.

    Second, ensure that the drill bit is properly lubricated before beginning to drill. This will help to reduce friction and heat, both of which can damage the drill bit.

    Finally, go slowly when drilling, and don’t force the drill bit through the concrete. Drilling too quickly can cause the drill bit to overheat and break.

    Drilling into the concrete with a core drill in 5 steps

    If you need to drill a hole into concrete, a core drill is the best tool for the job. Here are the steps you’ll need to take to successfully drill into concrete with a core drill:

    1. Choose the right core drill bit. Depending on the size of the hole you need to drill, you’ll need to select the appropriate drill bit. Core drill bits come in a variety of sizes, so make sure you select the right one for your project.
    2. Mark the spot where you’ll be drilling. Once you’ve selected the right drill bit, use a marker to mark the spot on the concrete where you’ll be drilling. This will help you stay on track as you drill.
    3. Affix the drill bit to the drill. Once the drill bit is secure, position the tip of the drill bit at the desired starting point on the concrete surface.
    4. Apply pressure and start drilling. Slowly apply pressure to the drill as you start drilling into the concrete.
    5. Drilling speed. As you drill deeper into the concrete, you can increase the speed of the drill. Stop drilling when the drill bit has reached the desired point.

    FAQ on drilling into the concrete

    What tools are necessary while drilling into concrete?

    There are a few different types of tools that can be used while drilling into concrete, depending on the size and depth of the hole that needs to be drilled. For smaller holes, a rotary hammer drill can be used, which uses a pounding action to create holes. For larger holes, a core drill may be necessary, which uses a diamond-tipped drill bit to slowly grind out a hole.

    Either of these types of drills, it is important to use the correct drill bit for concrete. Masonry bits are designed to drill through concrete and other masonry materials, and have a carbide tip that can withstand the impact of drilling.

    You’ll also need a dust mask to protect yourself from the debris, and some form of ear protection to guard against the noise.

    How to drill a 4 inch hole in concrete?

    To drill a 4 inch hole in concrete, you will need to rent or purchase a heavy-duty drill with a masonry bit. You will also need to wear appropriate safety gear, including eye protection and gloves.

    Before beginning, mark out the area where you will be drilling with a pencil or chalk. Then, begin drilling slowly, applying steady pressure. As the drill bit breaks through the surface of the concrete, increase the speed slightly. Continue drilling until you have reached the desired depth.

    Finally, remove the drill bit and clean up any debris.

    What are the drill bits for a concrete wall?

    For a small, shallow hole, a masonry bit will do the trick. These bits are designed to drill through tougher materials like concrete and mortar. If you need to make a larger hole, or one that is deeper, then you will need to use a carbide-tipped bit. These bits are designed to handle even the toughest materials, and can drill through concrete and masonry with ease.

    What types of drills do you use to drill into concrete?

    There are a few different types of drills that can be used to drill into concrete, depending on the desired result. If a large hole is needed, then a core drill may be the best option. This type of drill uses a diamond-tipped bit to cut a cylinder of material out of the concrete, leaving a hole in its wake.

    If a smaller hole is needed, then a hammer drill or rotary drill can be used. These drills create a hole by using a bit to pound or rotate its way through the concrete.

    Conclusion

    You can drill though the concrete with or without a hammer drill. You can use a regular standard drill or make a hole into the concrete with a hammer and chisel. It is up to the complexity of the project that determines the tools to be used. A wrongly chosen tool may damage the surface you are working on. I hope the detailed discussion we have presented will help you drill a concrete wall or other surfaces effectively.

  • How to Drill a hole Bigger than your Drill Bit

    How to Drill a hole Bigger than your Drill Bit

    Have you ever needed to drill a hole that’s just a bit too big for your drill bit? It’s a common problem, but luckily there’s an easy solution. With a little bit of creativity and a few simple tools, you can easily drill a hole that’s bigger than your drill bit. In this article, I will guide you through 7 techniques for drilling a hole bigger than your drill bit. Let’s get started.

    7 ways of drilling a hole bigger than your drill bit

    Use a hammer and chisel

    If you need to enlarge a hole that’s already been drilled, one easy way to do it is with a hammer and chisel. Here’s a quick overview of how to do it:

    1. Start by holding the chisel at a 45-degree angle to the hole.
    2. Use the chisel to score the edges of the hole.
    3. Once you’ve scored the edges, switch to holding the chisel perpendicular to the hole.
    4. Use the chisel to widen the hole by tapping it with the hammer.
    5. Keep widening the hole until it’s the size you need.

    Disadvantages of using a hammer and chisel to drill a bigger hole

    There are a few disadvantages to enlarging a hole with a hammer and chisel that you should be aware of before starting your project. One potential issue is that you could end up with an uneven hole if you’re not careful.

    Additionally, it’s easy to chip away too much material, which can weaken the overall structure. If you’re not experienced with using a hammer and chisel, it’s best to leave this job to a professional.

    Use a hand reamer

    Hand reamers are cutting tools used to enlarge and finish existing holes. They are available in a variety of sizes and can be used to ream both straight and tapered holes. Hand reamers are classified as either taper, plug, or bottom reamers based on their intended use.

    Taper reamers are used to enlarge the diameter of a straight hole and to produce a slight taper on the walls of the hole. Plug reamers are used to enlarge the diameter of a straight hole and to leave the hole with a smooth, slightly tapered finish. Bottom reamers are used to enlarge the diameter of a blind hole (a hole that does not pass completely through the workpiece).

    A hand reamer is a versatile tool that can be used on a variety of surfaces, including wood, metal, and plastic. This tool is especially useful for enlarging holes that are too small for a standard drill bit. When using a hand reamer, it is important to take care not to damage the surrounding material.

    If you need to enlarge a hole, you can do so with a hand reamer. Follow these five steps to get the job done:

    1. Select the appropriate size of hand reamer for your needs.
    2. Insert the hand reamer into the hole.
    3. Apply pressure to the hand reamer and rotate it clockwise.
    4. Continue rotating and applying pressure until the hole is the desired size.
    5. Remove the hand reamer from the hole.

    Disadvantages of using a hand reamer to drill a bigger hole

    A hand reamer is not as accurate as a drill bit, so the enlarged hole may not be perfectly round. The process of using a hand reamer can damage the surrounding material, making it more difficult to get a tight fit when inserting a fastener. Hand reamers are more likely to cause chipping or breakage, especially if the hole is near the edge of the material.

    Use a hole saw attachment

    A saw attachment is a type of saw blade that can be attached to a power drill. This allows the user to easily make cuts in wood, plastic, or metal. Saw attachments come in a variety of sizes and shapes, so it is important to choose the right one for the job at hand. This is a great tool for small projects around the house, such as cutting through drywall or trimming doorways.

    If you’re looking to cut a hole with a saw attachment, there are a few things you’ll need to keep in mind. Here are a few steps to help you get the job done:

    1. Choose the right saw attachment for the job. There are a variety of saw attachments available, so make sure you select one that is appropriate for the material you’re working with.
    2. Mark out the area you need to cut. Use a pencil or marker to clearly delineate the space you’ll be cutting.
    3. Attach the saw attachment to your drill. Make sure the attachment is firmly in place before beginning to drill.
    4. Begin cutting slowly. Apply steady pressure as you cut through the surface.
    5. Once the hole has been cut, remove any sawdust or debris.
    6. Finally, smooth the edges of the hole with sandpaper.

    Disadvantages of using a hole saw attachment to drill a bigger hole

    There are a few disadvantages of using a saw attachment to cut a hole in your wall. Firstly, it can be difficult to get a clean, straight cut with a saw attachment. If your hole is not cut perfectly straight, it can weaken the structural integrity of your wall.

    Secondly, saw attachments can create a lot of dust and debris, which can be messy and difficult to clean up. Finally, saw attachments can be dangerous to use, so it is important to be careful and follow all safety instructions when using one.

    Use a core drill attachment

    A core drill attachment is a specialized attachment that can be added to a power drill. This type of attachment is designed to make it easier to drill through tougher materials, such as concrete. You can use this attachment to drill a hole bigger than your drill bit.

    Core drill attachments typically consist of a carbide-tipped drill bit that is surrounded by a metal housing. This housing helps to keep the drill bit from breaking as it penetrates the concrete. Here’s a quick guide on how to use one:

    1. Start by attaching the core drill to your drill. Make sure it’s securely in place.
    2. Put on safety goggles and a dust mask to protect yourself from flying debris.
    3. Mark the spot where you’ll be drilling with a pencil or chalk.
    4. Start drilling slowly, then increase the speed as the bit starts to bite into the material.
    5. Keep drilling until you reach the desired depth. Then, carefully remove the core drill and clean up any debris.

    Disadvantages of using a core drill attachment to drill a bigger hole

    There are a few disadvantages to using a core drill attachment. One is that the attachment can put a strain on the drill itself, which can lead to damage or breakage. Additionally, the core drill attachment may not be as powerful as a standalone core drill, meaning it can take longer to drill through tougher materials.

    There will be a decrease in accuracy and stability, as well as an increase in the risk of kickback. Using a core drill attachment can also cause the drill bit to overheat, which can damage both the drill and the material being drilled.

    Use a spade drill bit

    A spade drill bit is a type of drill bit that is typically used for boring large holes in wood. The bit consists of a narrow, slightly curved blade with a pointed end. The blade is attached to a long, cylindrical shaft. The shaft is usually made of metal and is attached to a handle.

    Spade drill bits are often used to create pilot holes for large screws or nails. They can also be used to create holes for electrical wiring. In some cases, spade drill bits can be used to create decorative holes in wood.

    Below are some simple steps for creating a large hole with a spade drill bit:

    • To use a spade drill bit to drill a larger hole, first ensure that the bit is the correct size for the hole you need to drill.
    • Next, attach the bit to your drill, and set the drill to the appropriate speed.
    • When you are ready to begin drilling, apply pressure to the drill bit and slowly start drilling into the material.
    • Apply even pressure as you drill, and be sure to keep the drill bit level to avoid damage to the material.
    • If the material you are drilling is thick, you may need to drill through it in multiple passes. When you have finished drilling, remove the drill bit and clean up any debris.

    Disadvantages of using a spade drill bit to drill a bigger hole

    While spade drill bits offer a number of advantages, there are also a few disadvantages to consider before using one. Because spade drill bits are relatively short, they can cause problems when drilling through long pieces of wood.

    Spade drill bits tend to wear out more quickly than other types of drill bits, which can result in higher drilling costs over time. Finally, spade drill bits are not as well-suited for use with power drills as other types of drill bits, so it is important to be aware of this limitation before using one.

    Use a fortsner drill bit

    Forstner drill bits are a type of drill bit that is designed for use with a power drill. The bits are made of high-speed steel and have a pointed tip that helps to drill through wood quickly and easily. The bits are also available in different sizes, so you can choose the right size for your project.

    If you’re looking to make a large hole in wood, a Forstner drill bit is the perfect tool for the job. Here’s a quick guide on how to use one:

    1. Start by attaching the Forstner drill bit to your drill.
    2. Next, mark out the area where you want to make the hole.
    3. Then, drill a pilot hole in the center of the marked area.
    4. Finally, start drilling with the Forstner drill bit, applying gentle pressure and keeping the drill bit level.
    5. Keep drilling until the hole is the desired size.

    Disadvantages of using a fortsner drill bit to drill a bigger hole

    Forstner drill bits tend to drift off course more easily than other types of bits. This can be frustrating when trying to drill a precise hole. Another downside to Forstner bits is that they can be more difficult to control than other types of bits.

    This can be dangerous, especially when working with larger bits. Forstner bits are more expensive than other types of bits. This may not be an issue for some people, but it is something to keep in mind when making a purchase.

    Wiggling the drill

    Wiggling the drill is the most convenient way of making a larger hole. Here are five simple steps to follow:

    1. Start by drilling a small pilot hole to get the drill started.
    2. Once the drill is started, slowly increase the speed while continuing to apply pressure.
    3. As the drill bit starts to get hot, keep a firm grip and wiggle the drill back and forth.
    4. The heat from the drill will help to enlarge the hole.
    5. Once the hole is the desired size, release the pressure and let the drill cool down.

    Disadvantages of wiggling the drill

    One potential disadvantage of wiggling the drill to make a larger hole is that it may cause the drill bit to overheat. This could potentially damage the drill bit and make it less effective. Additionally, wiggling the drill may also make the hole less precise, which could be problematic if you’re trying to create a precise, clean hole.

    FAQ on drilling a bigger hole

    How to enlarge an existing hole in a metal?

    If you need to enlarge an existing hole in a piece of metal, there are a few different ways you can go about doing so. First, if the metal is thin enough, you can use a hand drill to slowly enlarge the hole.

    Another option is to use a power drill with a larger bit to enlarge the hole more quickly. Finally, if the hole is very small, you can use a Dremel tool or a similar rotary tool to slowly enlarge it.

    Keep in mind that when enlarging a hole in metal, you need to go slowly and be careful not to overheat the metal, as this can cause it to warp or break.

    How to drill a large hole in wood?

    If you need to drill a large hole in wood, use a sharp drill bit that’s appropriate for the size hole you need to make. A dull bit will not only make it more difficult to drill the hole, but it can also cause the bit to slip, which could damage the wood.

    Secure the piece of wood you’re drilling into a vise or clamp. This will help to keep it steady as you drill. If the wood is not secured, it can spin or move as you drill, which can cause the drill bit to slip and damage the wood.

    Can you drill a big hole with a small bit?

    Although you can technically drill a big hole with a small bit, it is not recommended. Doing so would require an excessive amount of time and effort, and is more likely to result in an uneven, imperfect hole. It is much easier and more efficient to use a bit that is appropriately sized for the hole you are trying to drill.

    What are hole enlarging drill bits for wood?

    Hole enlarging drill bits are designed to create larger holes in wood. This is often necessary when working with larger pieces of wood, or when needing to create a hole for a specific purpose. Enlarging the hole size can also be useful for aesthetic reasons, such as when creating a hole for a doorknob. There are a variety of hole enlarging drill bits available on the market, each designed for different types of wood and different hole sizes.

    Why do people drill bigger holes?

    There are a few reasons why people might choose to drill bigger holes. In some cases, it might be necessary in order to accommodate a larger object. For example, if you’re trying to put a screw into a piece of wood, and the current hole is too small, then you would need to make the hole bigger.

    In other cases, people might choose to drill bigger holes for aesthetic reasons. For example, if you’re hanging a picture on the wall, you might want to use a bigger drill bit to make the hole look nicer. Whatever the reason, it’s important to make sure that you’re using the right size drill bit for the job.

    Conclusion

    Drilling a bigger hole than the drill bit is not that difficult if you choose the right technique. I have discussed 7 different ways of doing this. Not all techniques are suitable for all kinds of projects. Therefore, you have to choose the appropriate technique for drilling a bigger hole and do not damage the surface you are drilling.

  • Can You Use a Hammer Drill to Mix Concrete

    Can You Use a Hammer Drill to Mix Concrete

    Are you wondering if you can use a hammer drill to mix concrete? The answer is yes, but there are a few things you should know before you get started. For one, a hammer drill is not going to be as effective as a dedicated concrete mixer. You’ll need to put in more effort to get the same results. You need to make sure you’re using the right drill bits and other attachments. In this article, I will discuss anything you want to know about mixing concrete using a hammer drill.

    How to use a hammer drill to mix concrete

    Is it possible to mix concrete with a hammer drill?

    Yes, it is possible to mix concrete with a hammer drill, but it is not recommended. A hammer drill is not designed for mixing concrete and will not do a good job of it. There are better tools designed specifically for mixing concrete, such as a concrete mixer. If you use a hammer drill instead, the concrete will not mix evenly and will be more difficult to work with. It is better to use a concrete mixer or a drill with a mixing attachment.

    What kind of hammer drill do you need to mix concrete?

    When it comes to mixing concrete, you’ll need a hammer drill that can handle the job. There are a few things to consider when choosing the right hammer drill for the job, such as the type of concrete you’ll be mixing and the amount of space you have to work with.

    If you’re mixing concrete for a small project, such as a sidewalk or patio, a cordless hammer drill is a good option. Cordless drills are easy to maneuver and don’t require a power source, making them ideal for small jobs. For larger projects, such as a concrete foundation, you’ll need a powerful corded drill. When choosing a hammer drill, make sure to pick one that has a mixing attachment.

    Required drill attachment for mixing mortar

    There are a few different types of drill attachments that can be used for mixing concrete, such as a paddle mixer or a rotary mixer. Paddle mixers are the most common type of attachment used for mixing concrete, as they are easy to use and relatively inexpensive. Rotary mixers are another option, but they are more expensive and can be more difficult to use.

    1. Mixing paddle: A mixing paddle is a great attachment for mixing small batches of concrete by hand. Simply attach it to your drill and get to work!
    2. Jiffy mixer: If you need to mix larger batches of concrete, a jiffy mixer attachment is a great option. It attaches to your drill and does all the work for you, making the job much easier.
    3. Cement mixer: For even larger batches of concrete, a cement mixer attachment is a way to go. It attaches to your drill and can mix up a large batch.
    4. Mixing drill bit: If you need to mix concrete in tight spaces, consider using a mixing bit. This attachment is specifically designed for mixing in small areas and can help you avoid wasting concrete.

    Preparing the concrete mix

    Concrete is a versatile construction material that can be used for a variety of applications. In order to ensure that your concrete mix is of the highest quality, it is important to follow a few simple steps when preparing it.

    1. First, determine the amount of concrete you will need. To do this, measure the length, width, and depth of the area you wish to pour concrete in. Once you have these measurements, multiply them together to calculate the total volume.
    2. Next, add the appropriate amount of water to your mixing container. The amount of water you’ll need will vary depending on the type of concrete mix you’re using.
    3. Once the water is added, slowly begin to add the dry concrete mix to the container. Be sure to mix the concrete thoroughly as you add it.

    Step by step process of mixing cement with a hammer drill

    Below is the process of mixing cement with a hammer drill in 5 simple steps:

    1. Start by putting on the appropriate safety gear, including gloves, goggles, and a dust mask.
    2. Next, assemble your hammer drill, mixing paddle, and concrete mix.
    3. Add the concrete mix to the desired area, and then wet it down with a hose.
    4. Begin mixing the concrete with the paddle, and then use the hammer drill to mix it more thoroughly.
    5. Continue mixing until the concrete is the desired consistency, and then use it as needed.

    how to mix concrete in a bucket?

    To mix concrete in a bucket with a hammer drill, start by adding one part cement, two parts sand, and three parts gravel to the bucket. Then, add enough water to make the mixture wet but not soupy. Next, use the hammer drill to mix the concrete for about two minutes. Finally, add more water if needed and mix for another minute.

    If you need to mix concrete but don’t have a mixer, you can do it by hand using a hammer drill. Here’s the step by step process:

    1. Pour the dry concrete mix into a clean bucket.
    2. Add the appropriate amount of water, using the mixing ratio indicated on the concrete mix bag.
    3. Stir the concrete mix and water together until it forms a uniform slurry.
    4. Place the bucket of concrete slurry next to your work area.
    5. Using the hammer drill, slowly and evenly mix the concrete slurry, being careful not to splash it out of the bucket.
      Continue mixing the concrete until it reaches the desired consistency.

    FAQ

    Can you use a paddle mixer for concrete?

    Yes you can. A paddle mixer is a type of concrete mixer that uses a rotating paddle to mix the ingredients. This type of mixer is often used on construction sites because it is easy to use and can mix large amounts of concrete quickly. Some paddle mixers can also be used to mix mortar or grout.

    What is a paddle mixer drill bit?

    A paddle mixer drill bit is a type of drill bit that is designed to create a stirring action when used in a drill. This action can be used to mix paints, mud, plaster, or other materials. The paddle mixer drill bit typically has a large, flat head with a series of paddles on the underside. These paddles help to create a vortex when the drill is turned on, which can then be used to mix the materials in the container.

    Can I use a normal drill to mix plaster?

    If you’re mixing a small amount of plaster, you can use a normal drill with a paddle attachment. However, if you’re mixing a large amount of plaster, it’s best to use a professional plaster mixer.

    What are concrete mixing tools for drill?

    The most common type of concrete mixing tool is the spiral drill bit, which is designed to create a spiral motion that helps to mix the concrete evenly. Other types of concrete mixing tools include the paddle drill bit, which is designed to create a paddling motion to help mix the concrete, and the auger drill bit, which is designed to create an auger motion to help mix the concrete.

    What is the easiest way to mix concrete?

    There are a few different ways to mix concrete, and the easiest method will depend on the tools and materials you have available. If you’re using a small amount of concrete for a DIY project, you can mix it by hand using a hoe or shovel. Just make sure to wear gloves and a dust mask to protect yourself from the concrete dust.

    Can you mix concrete by hand?

    You can mix concrete by hand, but it’s not recommended. It’s very labor intensive, and you won’t be able to achieve the same consistency as you would with a mixer. If you’re determined to mix concrete by hand, you’ll need to add the dry ingredients to a wheelbarrow or other large container. Slowly add water while you mix, until the desired consistency is achieved. Keep in mind that the more water you add, the weaker the concrete will be.

    How long do you mix cement in a mixer?

    To get the perfect mix for your cement, you will need to mix it in a mixer for the ideal amount of time. Depending on the type of cement you are using, the mixing time can range from a few minutes to up to an hour. For most types of cement, you will want to mix it for around five to ten minutes in order to get a smooth, consistent texture.

    How much water do I mix with concrete?

    The amount of water you mix with concrete will depend on the specific recipe you’re using. However, as a general rule of thumb, you should mix 1 part water to 2 parts cement.

    Conclusion

    You can use a hammer drill to mix concrete but it is not designed to mix concrete particles together. Hammer drills are durable, compact, and come in a variety of speeds. They also have adjustable speed ranges and can control the amount of power in the hammer driver. These drills are best suited for ceramic tile, masonry, brick, concrete, and cement work.

  • How to Determine Drill Bit Size for Screw

    How to Determine Drill Bit Size for Screw

    It can be difficult to determine what size drill bit you need for a given screw. In this blog post, we’ll give you some tips on how to choose the right size drill bit for your screw. We’ll also provide some guidance on how to drill the perfect hole for your screw, so that you can get a tight, secure fit.

    Consideration while choosing the drill bit

    There are a few things you need to take into consideration when determining drill bit size for screws. The first is the type of screw you’re using. There are three main types of screws: wood screws, metal screws, and machine screws. Each type of screw requires a different size drill bit.

    The second thing you need to take into consideration is the length of the screw. The longer the screw, the larger the drill bit you’ll need. The third thing to consider is the diameter of the screw. The wider the diameter, the larger the drill bit you’ll need.

    Finally, you need to take into consideration the material you’re drilling into. Softer materials like wood will require a smaller drill bit than harder materials like concrete.

    how to determine drill bit size for wall anchor

    When drilling the wall for hanging pictures or other wall decorations, you will need to use wall anchors to ensure that your decorations don’t damage your walls. But how do you know what size drill bit to use for your wall anchor?

    There are a few factors that you need to consider when determining drill bit size for wall anchor, such as the type of anchor you are using and the thickness of your wall. However, you also need to take into account the size of the drill bit that you have.

    In general, you should use a drill bit that is slightly smaller than the wall anchor. This will ensure that the wall anchor is secure and won’t damage your wall.

    If you are unsure about what size drill bit to use, you can always ask a professional at your local hardware store. They will be able to help you select the right size drill bit for your wall anchor.

    Determining drill bit size for wood screw

    While finding the right drill bit for a wood screw, the first step is to determine the type of wood screw you will be using. There are three common types of wood screws:
    Type 1: These screws are meant for use in softwoods and are not as strong as the other two types. They have a small diameter shaft and a tapered point.
    Type 2: These screws are for use in hardwoods and are stronger than Type 1 screws. They have a large diameter shaft and a sharp point.
    Type 3: These screws are for use in both softwoods and hardwoods. They have a medium diameter shaft and a sharp point.
    Once you know what type of wood screw you will be using, you can then select the appropriate drill bit.

    When it comes to wood screws, there are a few different factors that you’ll need to take into account in order to determine the best drill bit size to use. The first is the diameter of the screw itself – the larger the diameter, the larger the drill bit size you’ll need.

    The second factor is the length of the screw – the longer the screw, the longer the drill bit size you’ll need. And finally, you’ll also need to consider the type of wood you’re using, as different woods will require different drill bit sizes.

    FAQ on determining drill bit size

    What size drill bit should I use for 1/2 bolt?

    For most general projects around the home, a 3/8″ drill bit will suffice. However, if you are working with harder materials or need a more precise hole, you may want to use a 7/16″ drill bit. Be sure to use the correct size drill bit for your project to ensure a successful outcome.

    What size drill bit to use for 4.5mm screw?

    When it comes to screws, the most important measurement is the diameter of the shaft. The head of the screw will determine what size drill bit to use, but the shaft is what will determine the size of the hole that needs to be drilled. In general, it is best to use a bit that is slightly smaller than the screw shaft. This will ensure that the screw can be inserted easily and that it will be held securely in place.

    For a 4.5mm screw, a 3.5mm drill bit should be used. This will create a hole that is slightly smaller than the screw shaft, making it easy to insert the screw

    What size drill bit should I use for 5mm screw?

    When it comes to choosing the right size drill bit for a 5mm screw, there are a few factors to consider. The most important factor is the type of material the screw will be used in. For example, if the screw will be used in softwood, then a smaller drill bit may be sufficient.

    However, if the screw will be used in harder materials such as concrete or metal, then a larger drill bit may be necessary. Another factor to consider is the length of the screw. Shorter screws will require a smaller drill bit, while longer screws will need a larger drill bit. Finally, it is also important to consider the drill bit’s compatibility with the drill itself.

    How to choose drill bit for #8 wood screw?

    When you’re driving a #8 wood screw into lumber, you need to make sure you’re using the right drill bit. If the bit is too small, the screw won’t bite into the wood and will just spin. If the bit is too large, the hole will be too big and the head of the screw will sit flush with the surface of the wood.

    To get the right size drill bit, you need to match the diameter of the bit to the root diameter of the screw. The root diameter is the distance from one side of the screw head to the other, not including the threads. For a #8 wood screw, the root diameter is 0.164 inches.

    Therefore, for most applications, a 3/32″ or 1/8″ drill bit will work well. If you’re using a particularly hard or thick screw, or if you’re drilling into a very dense material, you may need to use a slightly larger bit. If you’re unsure, it’s always best to err on the side of a larger bit to avoid damaging the screw or the material.

    What size drill bit to use for pilot hole?

    When it comes to pilot holes, the size of the drill bit you use will depend on the screw you’re using. As a general rule of thumb, you want to use a drill bit that is about the same width as the screw’s shaft. This will ensure that the screw can be properly secured in the pilot hole.

    Therefore, you may use a bit that is 1/16″ smaller than the diameter of the screw. For example, for a #8 screw (which has a diameter of 1/8″), you would use a #7 drill bit.

    What size drill bit to use for #10 machine screw?

    When it comes to choosing the correct drill bit size for a #10 machine screw, there are a few things to keep in mind. The root diameter of a #10 screw is 0.190 inches or 4.826 mm. Therefore, the bit should be slightly smaller than the screw’s diameter. For a #10 screw, this would mean using a drill bit that is 9/64″ or 3.5mm in size.

    The second thing to consider is the type of material the screw will be going into. If it is a soft material, then a smaller bit can be used. However, if the material is hard, then a larger bit will be needed in order to create a pilot hole.

    Conclusion

    In conclusion, drill bit size is not so important when proper drill bit is used for screw. When chiseling, the chisel needs to be sharp enough so that only sharp chisels should be used. If blunt chisels are used then drill holes may be destroyed, and the work may be wasted.

    In nut and bolt, the drill bit size should be selected so that the bolt is removed easily. When drill bit size is selected, the screw should be inserted accurately. If bit is not accurate, screw may break. The use of proper drill size is very important.

  • How to Drill Through the Carpet?

    How to Drill Through the Carpet?

    If you’re looking for a way to drill through your carpet without damaging it, you’ve come to the right place. In this blog post, we’ll show you how to do just that. Drilling through carpet can be a bit tricky, but with our step-by-step guide, you’ll be a pro in no time. We’ll walk you through everything from choosing the right drill bit to drilling the perfect hole.

    So, whether you’re looking to install new flooring or just need to make a few holes for wiring, follow our tips and you’ll be able to get the job done quickly and easily. It’s always wise to keep a cordless drill to accomplish simple projects at home. You may read about our recommended cordless drills below 50 dollars if you wish.

    how to drill through carpet without snagging

    If you’re looking to drill through carpet without snagging, there are a few things you can do to increase your chances of success. First, be sure to use a sharp drill bit – a dull bit is more likely to catch on the carpet fibers and cause them to fray. Make sure to pull the carpet taut before drilling to avoid any bunching.

    Second, use a slow, steady speed when drilling – if you go too fast, you’re more likely to cause the drill bit to catch and tear the carpet. Go slowly and steadily when drilling to avoid any damage to the carpet. Finally, try drilling at an angle – this can help prevent the drill bit from catching on the carpet and making it more likely to drill through without snagging.

    Step by step process of drilling through carpet

    If you need to drill through carpeting, there are a few things you can do to minimize the risk of snagging the fabric. With a little care and attention to detail, you can drill through carpeting without damaging it. Here are five steps to help you drill through carpet without snagging:

    Choosing the right drill bit

    Choose the right drill bit. A sharp, carbide-tipped drill bit is ideal for drilling through carpeting. Avoid using dull or damaged drill bits, as they are more likely to snag the fabric.

    When it comes to choosing the right drill bit for drilling carpet, there are a few factors you’ll need to consider. Carpet is a fairly delicate material, so you’ll need to make sure you choose a drill bit that won’t cause too much damage. You’ll also need to take the thickness of the carpet into account – a thinner drill bit will be able to penetrate the carpet more easily than a thicker one.

    Once you’ve considered these factors, it’s time to start shopping around for the right drill bit. There are a few different places you can look, including hardware stores and online retailers. When you’re comparing drill bits, make sure to pay attention to the material they’re made from.

    • There are a few things to keep in mind when choosing a drill bit for carpet:
    • The size of the hole you need to drill
    • The thickness of the carpet
    • The type of carpet
    • The type of drill you are using

    Marking the spot

    Mark the spot where you will be drilling. Use a pencil or other sharp object to mark the spot on the carpet where you will be drilling. This will help you avoid accidentally drilling in the wrong area.

    When you’re ready to drill a hole in your carpet, it’s important to take the time to mark the spot first. This will help you avoid any accidental damage to your carpet or flooring.
    There are a few different ways that you can mark the spot for drilling.

    One option is to use a piece of tape. Place the tape over the area where you’ll be drilling and use a marker to outline the spot. Another option is to use a piece of chalk to mark the spot. Simply draw a circle around the area where you’ll be drilling. Once you’ve marked the spot, it’s time to start drilling.

    Use slow speed setting

    Slow speed settings are ideal for drilling carpet because they minimize the risk of damage to the carpet fibers. By drilling at a slower speed, you can avoid overheating the drill bit and melting the carpet fibers, which can cause fraying and damage the carpet’s overall appearance.

    Apply light pressure

    Using light pressure when drilling carpet can help prevent the drill bit from slipping. When you use too much pressure, the drill bit can start to slip on the carpet fibers and cause the drill to veer off course. This can damage the carpet and potentially cause injury. By using light pressure, you can help keep the drill bit from slipping and maintain control of the drill.

    Drill in short bursts

    Drilling in short bursts is the best way to drill through carpeting. This method prevents the drill bit from overheating and melting the carpet fibers. It also helps to avoid jamming the drill bit in the carpet.

    Use a carpet protector

    When drilling into a carpet, it is important to use a carpet protector. This will help to prevent the drill bit from slipping and damaging the carpet. To use a carpet protector, simply place it over the area where you will be drilling.

    After that, use a drill bit that is slightly smaller than the carpet protector. Drill slowly and carefully, making sure to keep the drill bit perpendicular to the carpet. When you are finished, remove the carpet protector and dispose of it properly.

    Tips for drilling through carpet for cable

    If you’re running cables through your carpeted floor, you’ll need to drill some holes. Here are some tips to help you get the job done:

    1. Choose the right drill bit. A standard twist drill bit will work for most materials, but you may need a special bit for the carpet.
    2. Mark the spot where you’ll be drilling. Use a piece of tape or a marker to outline the area where you’ll be drilling. This will help you stay on track.
    3. Drill slowly and steadily. Don’t apply too much pressure, or the drill bit will slip.
    4. Vacuum up the debris. After you’ve drilled through the carpet, use a vacuum cleaner to suck the debris.
    5. Use a guide when drilling to help keep the drill bit straight and avoid damaging the carpet.

    drilling through automotive or boat carpet

    Why drilling through an automotive or boat carpet?

    There are a few reasons why you might need to drill through automotive or boat carpet. For example, if you’re trying to install a new stereo system, you might need to drill through the carpet to run new wiring. Or, if you’re making repairs to your boat’s hull, you might need to drill through the carpet to access the underlying structure.

    In some cases, you might need to install new hardware, such as a new GPS system. Or, you might need to make repairs to existing hardware. Whatever the reason, drilling through carpet can be tricky. But with the right tools and techniques, it is possible to do it successfully.

    Tips for cutting hole in the boat or automotive carpet

    In either case, it’s important to take care when drilling through carpet. Make sure you’re using the right type of drill bit for the material, and take care not to damage the carpet any more than necessary. With a little care and attention, you should be able to drill through automotive or boat carpets without any problems.

    We would suggest the following tips while making hole and drilling through automotive carpet:

    • Use a sharp drill bit to avoid tearing the carpet. A dull bit can cause the carpet to fray and eventually tear.
    • Choose a drill bit that is slightly smaller than the desired hole size. This will help to prevent the carpet from stretching or ripping.
    • Always drill slowly and carefully to avoid damaging the carpet.
    • If possible, use a drill press rather than a hand drill. This will help to ensure a straighter, cleaner hole.
    • Use a piece of scrap carpet or cardboard underneath.

    Cutting a hole in the carpet (without drilling)

    If you need to cut a hole in your carpet, follow these steps:

    1. First, mark the area where you need to cut. Use a pencil or chalk to trace the outline of the hole.
    2. Next, use a sharp knife or carpet cutting tool to cut along the traced line.
    3. Once the hole is cut, remove any loose threads or fibers.
    4. Finally, seal the edges of the hole with a carpet adhesive or tape.

    FAQ

    How do you cut a woven rug?

    To cut a woven rug, you will need a sharp knife or a pair of scissors. First, find the edge of the rug that you want to cut. Then, carefully cut along the edge of the rug, being careful not to cut yourself. Once you have cut the rug, you can then proceed to trim any excess fabric or fringe.

    You’ll need to make sure that you have a sharp cutting implement – a sharp knife or pair of scissors will do the trick. Be very careful not to damage the backing of the rug as you cut it. And finally, you’ll need to make sure that you cut the rug evenly so that it lies flat when you’re finished.

    How much does it cost to repair a patch of carpet?

    The cost to repair a patch of carpet will vary depending on the size of the patch, the type of carpet, and the extent of the damage. A small patch of carpet can be repaired for as little as $50, while a larger patch or more severe damage may cost up to $200 to repair.

    Can you run a screw through the carpet?

    It is not recommended to do this as it could cause damage to the carpet. If you must install a screw into the carpet, be sure to use a wide, flat-head screw so that it will sit flush against the carpet fibers and not cause too much damage.

    How to cut a circle on the carpet?

    If you need to cut a perfect circle in your carpet, there are a few different methods you can use. One method is to use a compass or a large circle template. Simply place the compass or template in the desired spot on the carpet and trace around the outside edge with a pen or chalk. Once the circle is traced, use a sharp knife or carpet cutting tool to carefully cut along the line.

    Another method for cutting a carpet circle is to make a paper template first. To do this, trace a large circle onto a piece of paper and then cut it out. Once you have your paper template, lay it on top of the carpet in the desired spot and trace around the outside edge with a pen or chalk. Then cut the carpet around the marked area with a sharp knife.

    How do you hide electrical cords in the middle of room?

    If you have cords running across the middle of a room, there are a few ways you can hide them and make them less of an eyesore. One option is to use cord cover strips that you can attach to the floor and run the cords through.

    Another option is to use cord management boxes or wraps to contain the cords in a neat and tidy package. Finally, you can also use furniture to conceal cords – for example, placing a sofa or table over top of them. Whichever method you choose, make sure that the cords are not a trip hazard.

    What’s the process of patching a hole in a damaged carpet?

    If you have a damaged carpet, you’ll need to patch the hole to prevent it from getting worse. Here’s a step-by-step guide on how to do it:

    1. Start by measuring the hole and cutting a piece of patching material that’s slightly larger than the damage.
    2. Apply a thin layer of adhesive to the back of the patching material.
    3. Place the patching material over the hole and press it down firmly.
    4. Use a roller or a brush to smooth out the surface.
    5. Let the adhesive dry for the recommended time before walking on the patched area.

    Conclusion

    The carpet is very thick, but there are ways to cut through it. You just need an appropriate tool, solid preparation, and a steady hand. Once you’ve mastered the basics, you can install new flooring, access plumbing, or perform other repairs with ease.

  • Best Cordless Drill For Hanging Pictures

    Best Cordless Drill For Hanging Pictures

    When it comes to hanging pictures, you need a reliable and powerful cordless drill to get the job done right. But with so many cordless drills on the market, it can be hard to know which one is the best for the job. In this blog post, we’ll take a look at the best cordless drills for hanging pictures, so you can find the right one for your needs. We’ll consider factors like power, price, and features to help you make the best decision for your home.

    Top 5 Cordless drill for hanging pictures

    DEWALT Cordless Drill DCD771C2 for hanging pictures on a wall

    The DEWALT Cordless Drill DCD771C2 is one of the best cordless drills for hanging pictures. It has a high speed transmission that delivers two speeds (0-450 and 1,500 rpm) for a range of fastening and drilling applications. The 1/2-inch single sleeve ratcheting chuck provides tight bit gripping strength. The ergonomic handle provides comfort and control. The LED light with 20-second delay after trigger release is a great feature.

    The DEWALT Cordless Drill DCD771C2 is a great choice for anyone looking for a powerful and compact drill. The drill’s high-performance motor delivers 300 unit watts out (UWO) of power, making it perfect for a wide range of applications. The high-speed transmission makes it easy to complete projects quickly and efficiently.

    Advantages of DCD771C2 for hanging pictures

    1. The high speed transmission of the Dewalt 20V drill provides 2 speeds for a range of fastening and drilling applications.
    2. The 1/2-inch single sleeve ratcheting chuck provides tight bit gripping strength, making it perfect for use in a variety of applications.
    3. The ergonomic design of the drill makes it comfortable to use, even for extended periods of time.
    4. The battery life of the drill is impressive, meaning that you can use it for a long time before having to recharge it.
    5. The Dewalt Cordless Drill DCD771C2 is a versatile and powerful tool that is perfect for a variety of drilling and fastening applications.

    Milwaukee 2606-21CT M18 for hanging pictures on plaster board

    The Milwaukee 2606-21CT M18 Cordless Drill is a great choice for those who need a powerful and reliable drill. It features a 4-Pole Frameless Motor that delivers 500 in-lbs of torque and 0-400/0-1,800 RPM. Additionally, the Redlink Intelligence provides overload protection against abusive situations. Finally, the Redlithium Battery Pack gives you 40% more run-time, 20% more speed, and 20% more torque.

    The Milwaukee 2606-21CT M18 is a great choice for drilling on plasterboard because of its Frameless Motor. This motor provides enough torque, making it perfect for drilling through plasterboard and hanging your pictures.

    Advantages ofMilwaukee 2606-21CT M18 for hanging pictures

    1. The Milwaukee 2606-21CT M18 Cordless Drill has a powerful 4-pole frameless motor that delivers 500 in-lbs of torque and 0-400/0-1,800 RPM.
    2. It features Redlink Intelligence, which protects against abusive situations and provides overload protection.
    3. The drill has a Redlithium battery pack that delivers 40% more run-time, 20% more speed, and 20% more torque.
    4. It has a compact design that makes it easy to use in tight spaces.
    5. The drill also has an LED light that illuminates the work area.

    DEWALT DCD996B cordless drill for hanging pictures on stairs

    The DEWALT DCD996B cordless drill is one of the best cordless drills for hanging pictures. It is a DEWALT-built high power, high efficiency brushless motor of DEWALT 20V hammer drill that delivers up to 75% more runtime vs. 18V NiCad brushed motors.

    The DEWALT DCD996B also has a LED light with 20-second delay after trigger release, providing superior visibility in dark or confined spaces. With a 3-speed transmission and a 2-speed range, this hammer drill offers versatility for a variety of applications. The DEWALT DCD996B is one of the best cordless drills for hanging pictures.

    DEWALT DCD996B cordless drill is a good choice for hanging pictures on stairs because of its high power, high efficiency brushless motor. With this motor, the cordless hammer drill can deliver up to 75% more runtime than 18V NiCad brushed motors. In addition, the cordless hammer drill features a heavy-duty 1/2-inch metal ratcheting chuck with carbide inserts for superior bit gripping strength.

    Advantages of DEWALT DCD996B for hanging pictures

    1. The DEWALT DCD996B cordless drill has a high power, high efficiency brushless motor that delivers up to 75% more runtime than 18V NiCad brushed motors.
    2. The cordless hammer drill features a heavy-duty 1/2-inch ratcheting nitro-car that makes it easy to drill through tough materials.
    3. It also has a built-in LED light that illuminates the work area, making it easier to see what you’re doing.
    4. The drill comes with a built-in battery charger that makes it easy to keep the drill charged and ready to use.
    5. The drill also has a built-in belt hook that makes it easy to carry

    BLACK+DECKER Cordless Drill LDX120C for hanging pictures in a caravan

    This BLACK+DECKER cordless drill is a great choice for hanging pictures in a caravan because it is lighter and more compact than other cordless drills. It also has Lithium Ion Technology and a 20V MAX, which makes it more durable and longer lasting. Additionally, the 11 position clutch provides precise control for drilling into wood, metal, plastic, and all screwdriving tasks.

    The BLACK+DECKER Cordless Drill LDX120C is one of the best cordless drills for hanging pictures. It features Lithium Ion Technology and 20V MAX, making it lighter, more compact, and longer-lasting than other cordless drills. The integrated bit holder under the chuck is a great feature that allows you to keep your bits organized and within reach.

    Advantages of LDX120C for hanging pictures

    1. The BLACK+DECKER Cordless Drill LDX120C is based on Lithium Ion Technology and 20V MAX, making it lighter and more compact than other drills.
    2. The 11 position clutch provides precise control for drilling into wood, metal, plastic, and all screwdriving tasks.
    3. The integrated bit holder makes it easy to keep track of your bits and drill bit sizes.
    4. The cordless design makes it easy to use in tight spaces and around the house.
    5. The BLACK+DECKER Cordless Drill LDX120C is a versatile tool that can handle a variety of tasks.

    BOSCH Power Tools Drill Kit PS31-2A for hanging pictures in a hallway

    This BOSCH Power Tools Drill Kit PS31-2A is one of the best cordless drills for hanging pictures in a hallway. It is very light-weight at just over two pounds, making it very easy to handle. The performance-to-weight ratio is excellent, making it a great solution for a wide range of tasks.

    The Bosch PS31-2A is a great cordless drill for hanging pictures. It is very precise, with two speeds and 20 plus 1 clutch settings. It is also very durable, with an all-metal gearbox and aluminum housing. Finally, it has a 12-volt max lithium-ion battery, providing ample power for most tasks.

    Advantages of BOSCH PS31-2A for hanging pictures

    1. The PS31-2A has professional grade power at an incredibly light-weight of just over two pounds; making it a great solution for electricians, plumbers or anyone who needs a powerful drill in a compact package.
    2. It is built with Bosch’s quality and durability in mind, meaning it will stand up to heavy use and last for years to come.
    3. Its small size makes it perfect for maneuvering into tight spaces and getting into hard-to-reach areas.
    4. The powerful motor of the drill provides plenty of torque for even the most challenging drilling applications.
    5. The PS31-2A is very affordable, making it a great value for the money.
    6. This drill is very versatile and can be used for a variety of tasks, thanks to its wide range of accessories.

    Buying guide for the best cordless drills for hanging pictures

    When it comes to hanging pictures, you need a cordless drill that can handle the job. But with so many options on the market, it can be hard to know which one to choose. That’s why we’ve put together this buying guide to help you find the best cordless drill for hanging pictures.

    Size of the drill for pictures

    The size and dimension of the cordless drill you’ll need for hanging pictures will depend on a number of factors, such as the size and weight of the pictures you’re hanging and the type of wall you’re hanging them on. With that said, a good rule of thumb is to choose a drill that is comfortable for you to hold and that has enough power to penetrate the wall you’re working with.

    Motor power

    When it comes to hanging pictures, the best cordless drill to use is one with moderate power. You don’t want a drill that is too powerful, as it could damage the wall, and you also don’t want one that is too weak, as it will make the job take longer. For most people, a cordless drill with around 10-12 volts of power will be the best option. With this amount of power, you should be able to hang pictures quickly and easily, without damaging the wall.

    Torque for hanging picture

    The cordless drill you use for hanging pictures should have adjustable speed and torque settings. For best results, start with a slow speed and gradually increase the speed until you find the perfect setting for your needs. When it comes to torque, it’s best to start with a lower setting and increase it as needed. With a little trial and error, you’ll soon find the perfect speed and torque settings for your cordless drill and hanging pictures.

    Other considerations

    Price is always an important consideration. When it comes to finding the most appropriate price for a cordless drill, it is important to consider what the drill will be used for. In this case, the drill will be used for hanging pictures.

    There are a few things to consider when determining the price for a cordless drill. The first is the brand of the drill. There are many different brands of cordless drills on the market, and each brand has its own price range.

    The second is the features of the drill. The more features the drill has, the more expensive it will be. Usually, the price of a cordless drill for hanging picture should not be more than $200. If you add some additional accessories, then the price may get increased.

    FAQ

    Can I hang pictures without nail hooks?

    If you’re wondering whether you can hang pictures without nail hooks, the answer is yes. There are a few different ways to do this, depending on the type and weight of the picture you’re wanting to hang. For lighter pictures, you can use adhesive strips or even putty to adhere the picture to the wall. Heavier pictures will require the use of hangers that are affixed to the back of the frame. No matter what method you use, be sure to test it out on a small area of the wall first to ensure that it won’t damage your paint or wallpaper.

    How to hang pictures on chains?

    If you’re looking for a more unique way to hang your pictures, using chains is a great option. Here’s a step-by-step guide on how to do it:

    1. Start by measuring the length of chain you’ll need. You’ll want to leave enough slack so that the picture can hung at the desired height, but not so much that it looks messy.
    2. Once you have the length of chain determined, use a pair of pliers to attach a hook to one end.
    3. The other end of the chain will need to be attached to the wall. You can do this by screwing in a small nail or using a adhesive hook.
    4. Now hang your pictures on the chain.

    Do I need a drill to hang pictures in groups?

    If you’re planning on hanging multiple pictures in a group, you’ll likely need a drill to make things easier. Drilling into the wall provides a more secure way to hang your pictures, and prevents them from falling off the wall if they’re bumped. If you don’t have a drill, you can try using a hammer and nails, but this isn’t always as effective.

    Can I hang pictures above the sofa?

    If you’re wondering if you can hang pictures above the sofa, the answer is most likely yes! However, there are a few things you’ll want to keep in mind before proceeding. First, consider the size and weight of the pictures you’re planning to hang. If they’re large or heavy, you’ll want to make sure the wall can support their weight. You may also want to use picture hangers specifically designed for heavier frames.

    Another thing to keep in mind is the height of the pictures in relation to the sofa. You’ll want to hang them high enough so that they don’t block the view when someone is sitting on the sofa. A good rule of thumb is to hang them about 6 to 12 inches above the sofa.

    What kind of drill do I need to hang pictures on picture rails?

    To hang pictures on a picture rail, you will need a drill with a 3/16-inch bit. Use a level to mark where you want the holes drilled, then drill the holes about 1/2 inch deep. Tap in wall anchors with a hammer, then screw in the screws.

    What kind of cordless drill do I need to hang pictures in the bathroom?

    If you’re hanging pictures in a small bathroom, then you’ll need a cordless drill that’s lightweight and easy to maneuver. You might also want to consider a cordless drill with a built-in level, so you can be sure your pictures are hung straight.

    For larger bathrooms, you’ll need a cordless drill that’s more powerful, so it can easily drill through tile or other materials. porcelain tiles are much harder than ceramic tiles and require a different type of drill bit. In general, however, most tiles can be drilled using a standard masonry bit. You’ll also need to make sure that the drill has a clutch, so that you can avoid stripping the screws.

    What are the considerations while drilling on a wall for hanging pictures?

    When drilling into walls, there are several things to consider in order to avoid damaging the structure or injuring yourself. Always use the proper safety gear, including goggles and a dust mask. If possible, have someone hold the drill for you.

    Start by drilling a pilot hole using a smaller drill bit. This will make it easier to insert the larger bit later on. Be sure to keep the drill bit perpendicular to the wall to avoid damage.

    Once you’ve made the pilot hole, insert the larger drill bit and drill slowly and evenly. Stop periodically to check the depth of the hole. Remove the drill bit when the hole is deep enough to accommodate the picture hanger.

    Conclusion

    In summary, cordless drills are compact, lightweight and easy to maneuver.The best cordless drill for hanging pictures will bet most powerful, with lightweight and ergonomic and it comes with a battery and charger.It should also have an adjustable torque, have a soft grip handle, have extra long accessory, have compact design, have an extra battery, have a maximum torque and come with a bag.